in this tutorial i will create a "turbo" badge for the panel above the glovebox.
at first things you will need :
el foil
converter from 12V dc to 110V ac
clear material (i used plexiglas/perspex, but wouldnt recommend it anymore)
paper
black marker or something
beer (as common in evey tutorial. it depends on your skills how many beer you will need for this job
here is a pic of the foil, the colour is green with a bit of blue but looks like white on the foto
be careful when connecting/soldering wires to the contacts on the foil
you can cut the foil as you want as long the connection of the foil to the two wires is not broken
you can laminate the foil after that (some are already laminated) to prevent damaging the foil (damageable when bending it)
1. create the logo
create your own logo, make sure you maintain the dimensions of the foil
2. print
print it on paper, go to copyshop and copy it to overhead transparency (adjust the contrast to the darkest to make sure the black areas are really black)
3. repainting
in my case the black areas where a bit transparent so i had to repaint the black areas with the pen
before:
after:
4. put everything together
cut out the overhead transparency logo in the same size as the el foil and tape them together; attach it now to the underside of the perspex and tape/ glue them together (make sure there is no glue on the visible side)
now you have to darken the upper side of the perspex (the el foil is too bright ) previously i used half transparent black color, but i found out that tinting foil is alot easier to work with
connect the el foil to the converter, make sure everything is good isolated cause 110V can really hurt
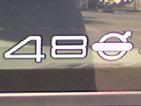
some pics of the result