
Step 2: Know where all the fastening points for the bumper are and spray them liberally with your penetrating fluid. Do this well in advance of attempting removal (think daily, for a week), as they are very likely to shear. You could try heat, but the problem is that the bumper bar is wrapped in foam which is likely to be susceptible to heat and quite possibly, inflammable.
The fixing points are:
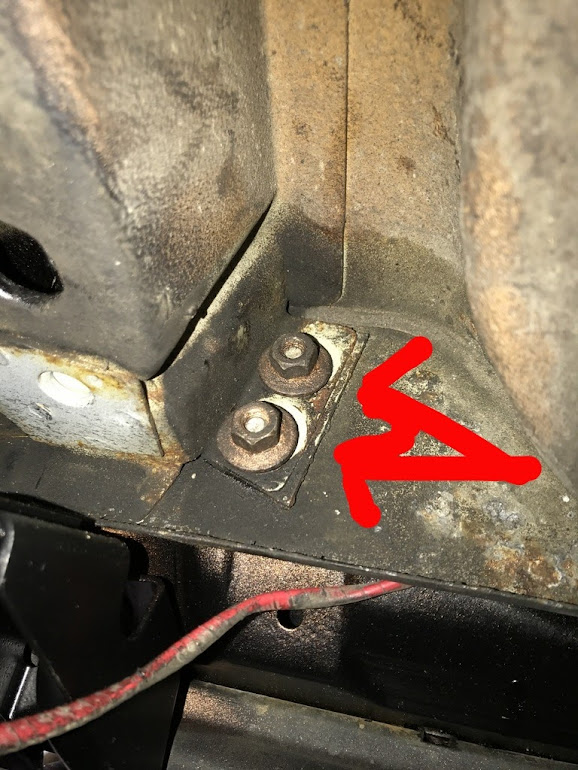
The bumper bar - 4 13mm nuts, either side of the chassis leg, and one 13 mm bolt through the towing eye and into the chassis leg.

then on either side, 2 screws through the rear arch liner

and 1 screw underneath

Step 3: Disconnect the foglamp and numberplate wiring from the boot (remove the spare wheel cover and wheel to find them) and pop out their oval grommets - The wiring will go out of the car along with the bumper.
Step 4: Hopefully your fixings are all undone (if not, head back to step 2 and keep spraying). The bumper end caps just need pulling out slightly to clear the wing and the bumper pulls off backwards.
Step 5: To remove the skin from the bumper, remove the 4 screws per side from the lower retaining strips

as well as the two outer screws, making sure not to lose the vital stepped washer

and then repeat the process on the screws on the rear of the bumper bar.
Reassembly is the opposite of removal, but please cover EVERYTHING in copper grease - Yes, even those screws that go into plastic.

