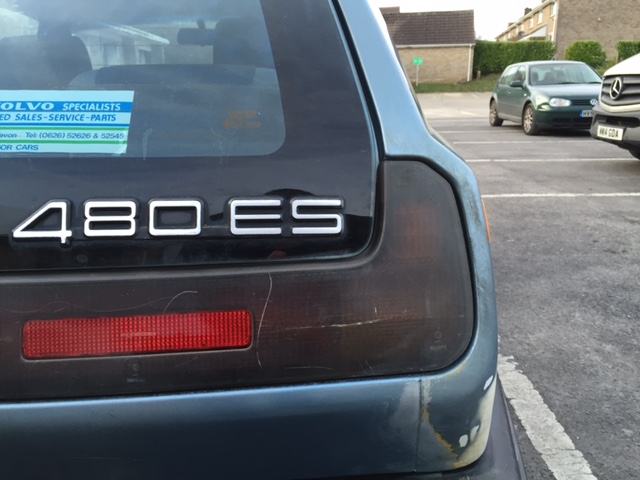
June 2021 - Operation Paintshop!
Apologies about the delay folks; I had to join the very back of the paintshop queue. This is how we got there...
I always wanted this driveable for the paintshop. It makes delivery logistics easier, and the paintshop can shunt it about as they please.
So lets get this thing running and driving...
Engine Compartment Reassembly
This is where we left off...

All the standard engine reinstallation tasks and I haven't taken any detailed photos here. Fuel lines, connectors, alternator, power steering pump, clutch cable, throttle cable, reservoirs... all fairly standard stuff... apart from the following items of note...
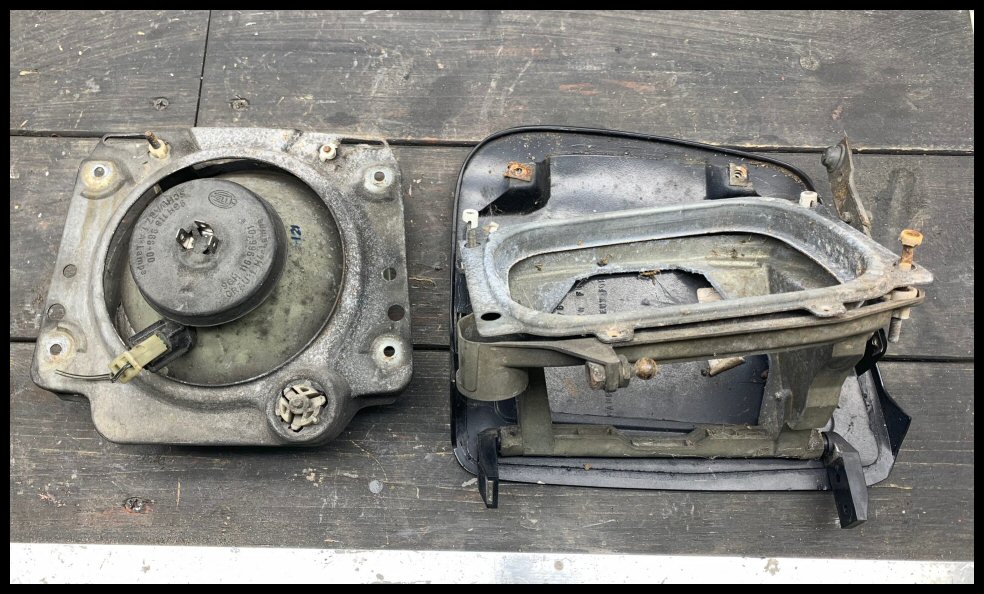
Airbox
Thanks David... cleaned up and fitted to the powder coated brackets...
Airbox (previously cleaned) reassembled with new MAHLE filter...
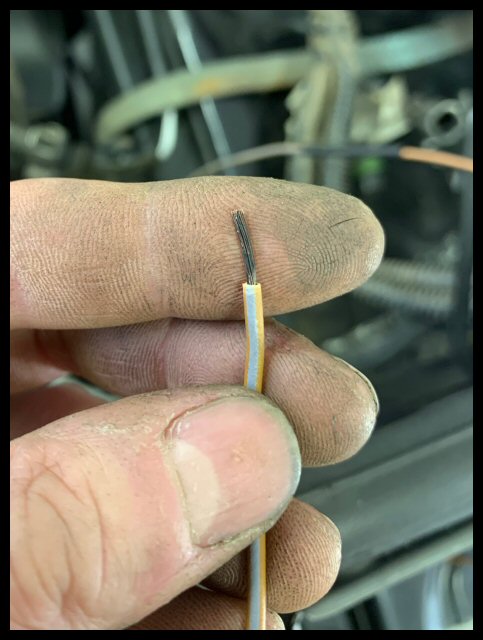
 Typical Wiring Condition
Just a typical example of why everything takes so long. Take for example the reverse lamp switch...

Connectors badly corroded, so these are cut off, only to find the associated wiring is in a bad state too. I don't like it when you cut and sheath back, and all you get is black oxidised copper....
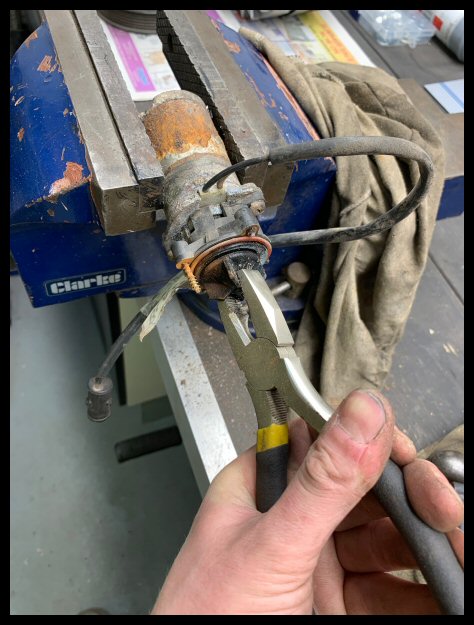
Thought i'd document here how I terminate such spades. I have a dislike of the 'blue crimps'. I don't think they look professional enough. So here's my take...
1) Cut back until you get bright copper (extend the wire if necessary if cut-back was severe). Load the cable with a shield and heat shrink...

2) Use a new 'double-crimp' spade, then slide up the heat shrink and heat...

3) Slide up the boot, then pack full of grease if the location is hostile...

Reverse lamp switch ready to connect!
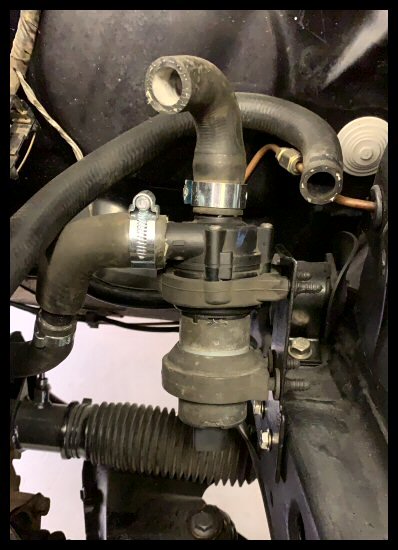
Turbocharger Water Pump
No doubt about it, this was seized solid!
I obtained off eBay a second hand item for a VW Sharan, with bracket. I chopped up the bracket to see what I could do with it...

This pump is VAG # 3D0 965 561D... it's plentiful and cheap... even new from Bosch it's no more than £60. Fitted on a range of VWs up to 2010.

Modifying the base plate...

Trialling the base plate location. Much easier now without ABS


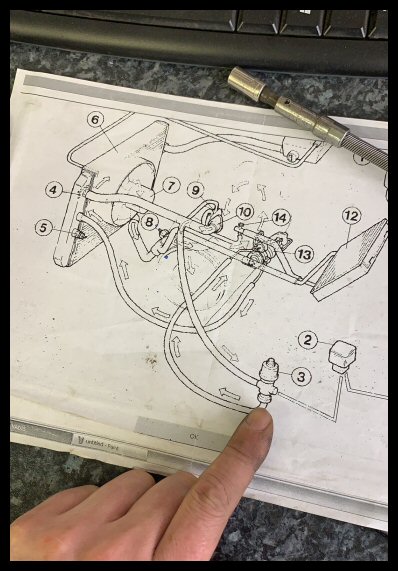
The pipe diameters are slightly different with the VAG pump, so it does need some plumbing adjustments...
Using the Turbo plumbing map, because I hold my hands up... I had completely forgot where everything goes!

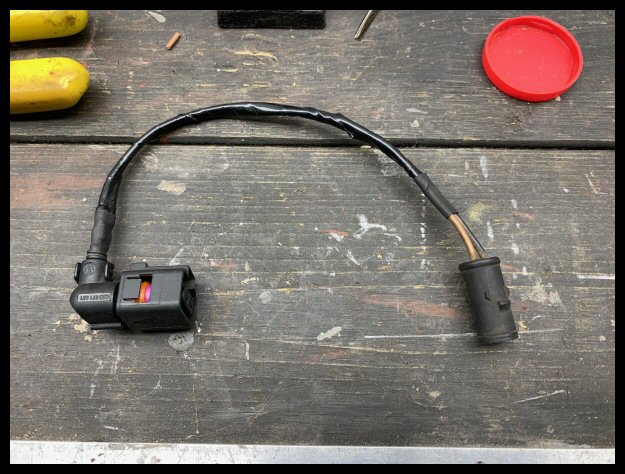
You then have to convert the VAG wiring to meet the 480 connector. This is because I want something 'plug-and-play' for when it inevitably fails again and I have to buy another...

Conversion fly-lead made...
My last plumbing connection - and experience tells me if there is an opportunity to add another bleed screw then you might as well...
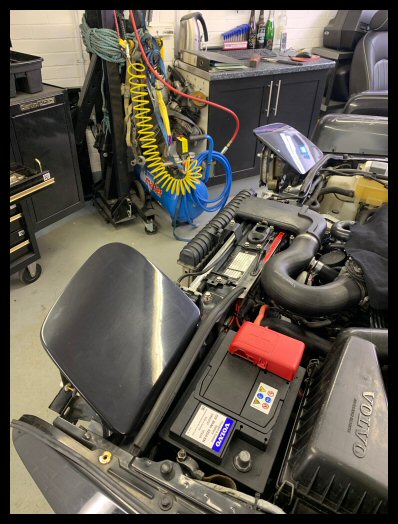
 Battery & Tray
One of my greatest pet hates... these screw type battery terminals...
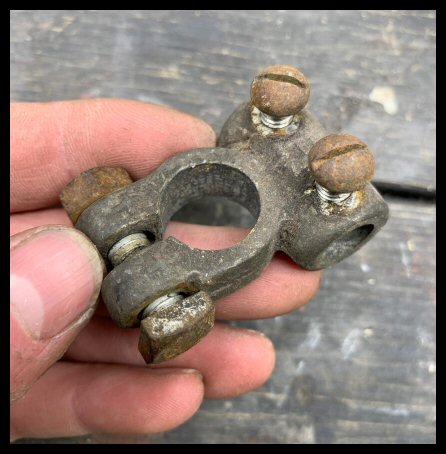
I hate them. A flat blade screw head has no place on a motor vehicle post-1960.
General engine bay wiring not the greatest... a downright fire risk to be honest!

All ground straps cleaned and bolted down with copper slip...

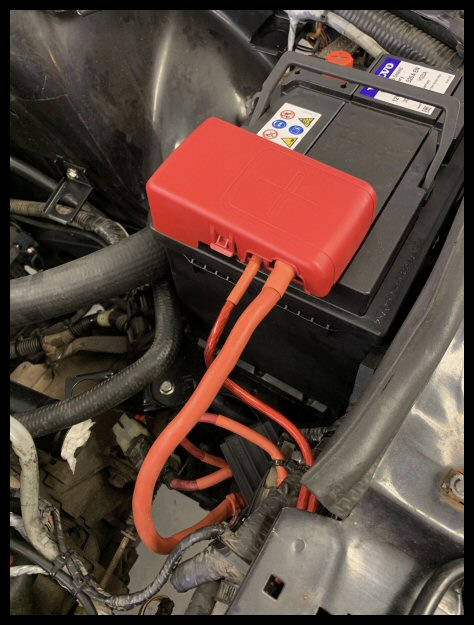
The battery; where to start?
Well, Marshalls Volvo Cambridge had a good laugh when I asked about batteries, and if they had Volvo logos on?
I don't know what it is, but I just find great comfort in seeing an OE battery. Naff all difference performance wise, but they just make an engine bay look a little more 'OE'.
I have been previously critical of Marshalls Cambridge - but the young parts lad was ace. He raised a technical enquiry with Volvo HQ on the smallest battery they sell, if it had Volvo stickers, and if the dimensions and post orientations were all as I needed.
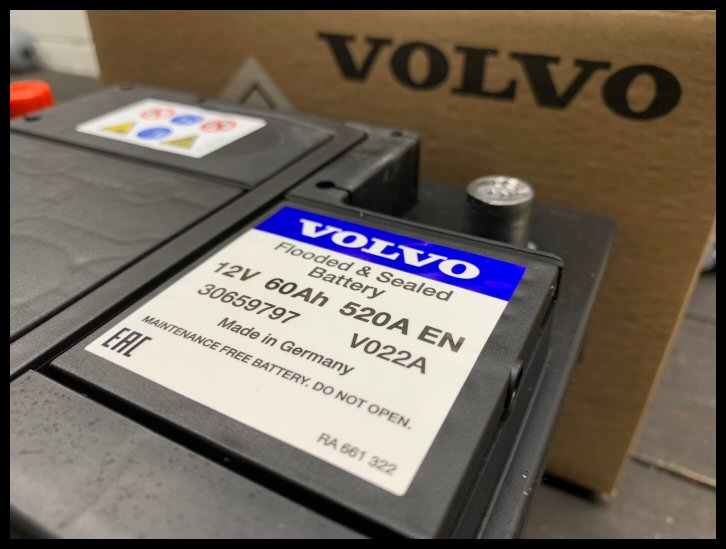
A week later and I pay a tidy sum for this...
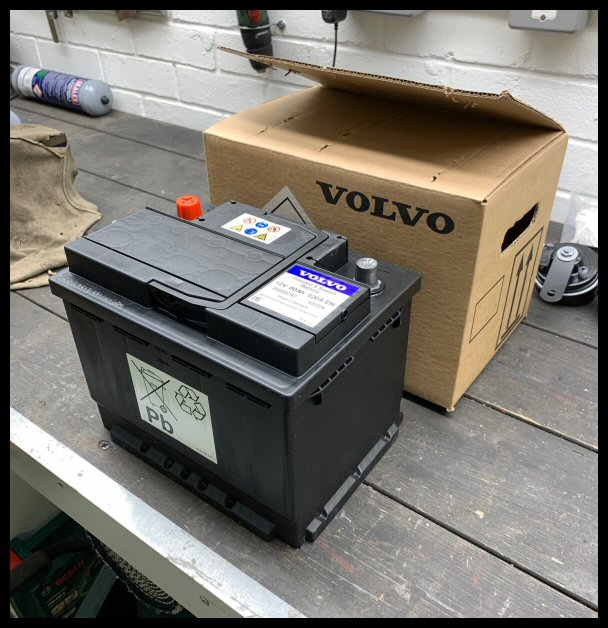
It is absolutely gorgeous. The Volvo font is proper old-school and not like the current logo - which is great news. The most important thing is, I now have this critical sticker. If the battery dies, the sticker will be coming with me or at least copied...
Regarding the battery terminal, I have used this Renault solution for a variety of cars I have owned - intended for a mk1 Megane...
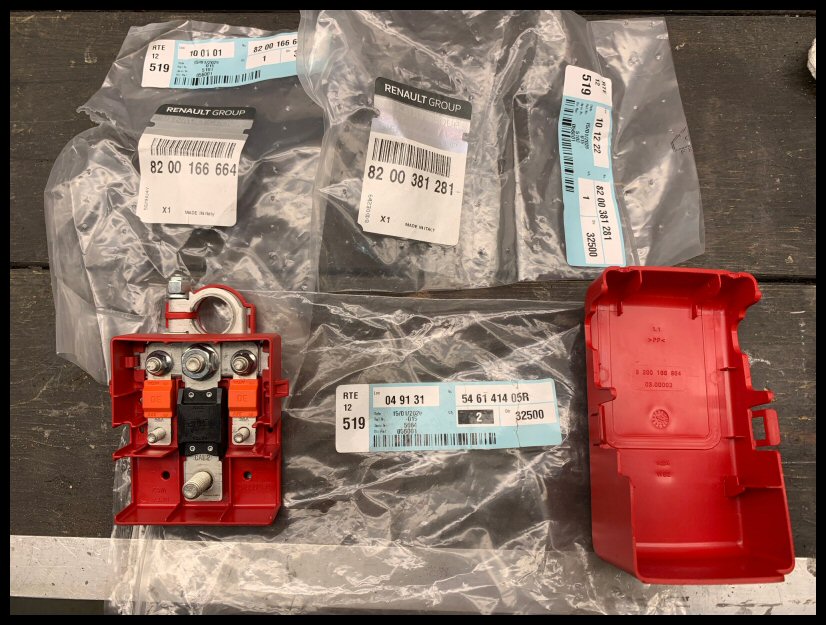
It's neat, tidy, internally fused and shielded. I plan to use this with a single main cable...

Down to the following universal junction box, also by MTA...
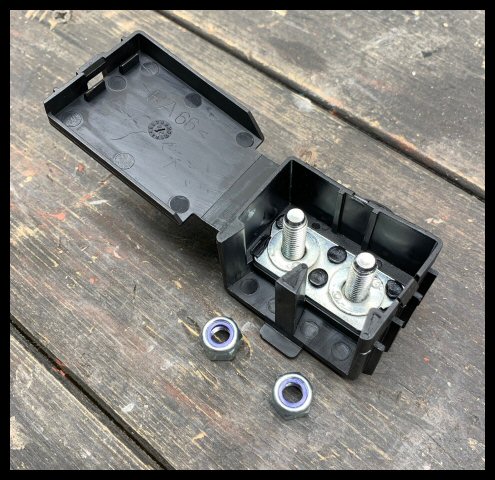
Junction box mounted to a spare captive nut on my battery tray. Thank goodness i'm non-AC...
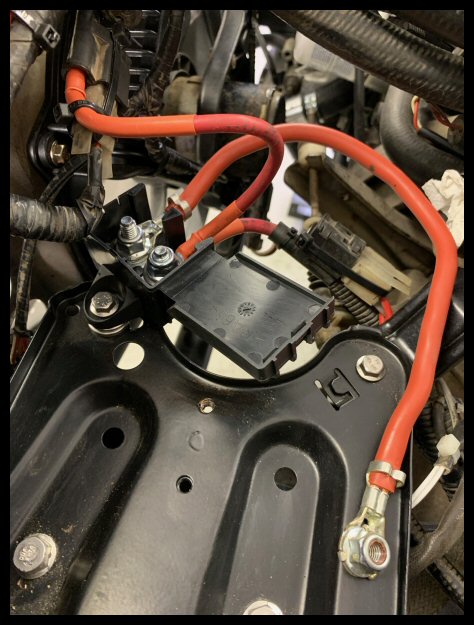
Battery terminal fitted...
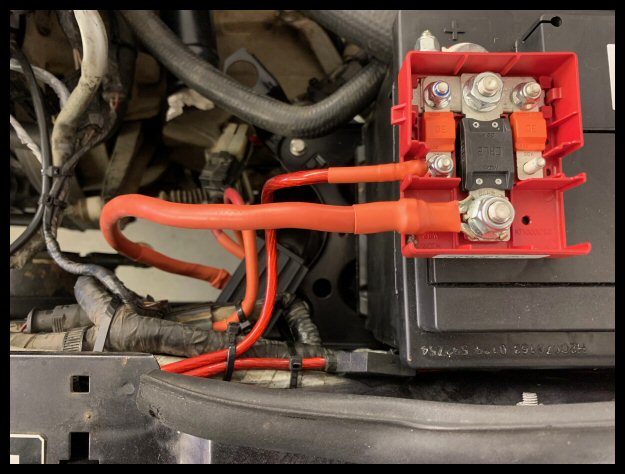
Much neater, much safer. Allows additional fused take-offs for my future audio set-up.
 Radiator Hoses
On closer inspection, the bottom hose didn't pass a quality check. A chunk worn out due to a fret with a bolt head.
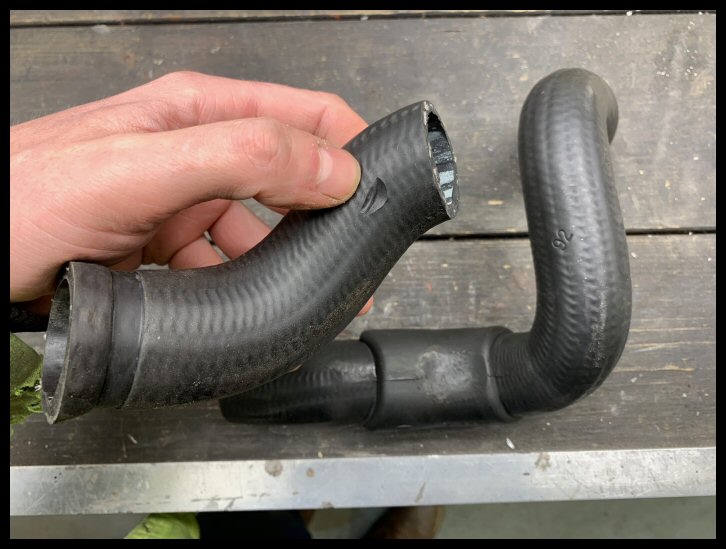
The bottom hose is quite an intricate item as it has an in-built buffer where it passes over the subframe. And, suprise suprise, they are not available - even as a pattern part. I searched high and low with no success.
The crazy thing is, eBay is FLOODED with top hoses for as low as £12 posted. These are by Gates too, not anonymous rubbish.
The good thing about these, other than being dirt cheap, is that they are the perfect diameter to be cannibalised. So I bought one to go under the knife...
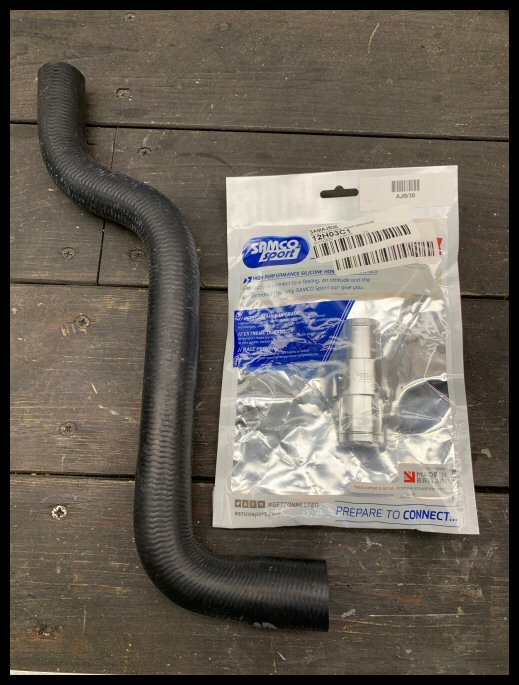
Cut and joined with a Samco billet joiner...
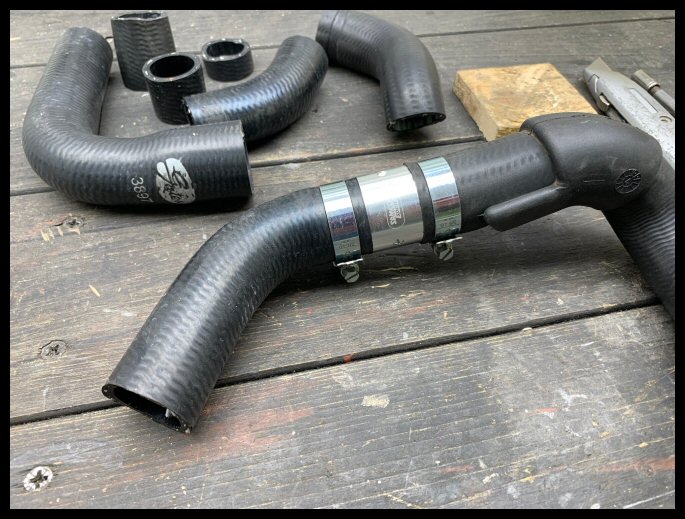
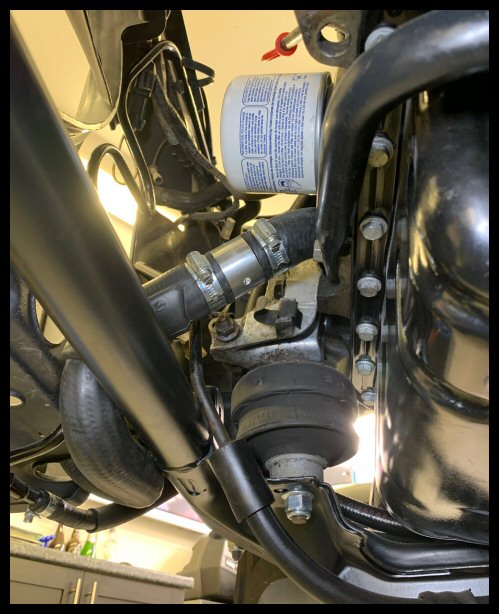
All fitted, keeping the original subframe buffer...
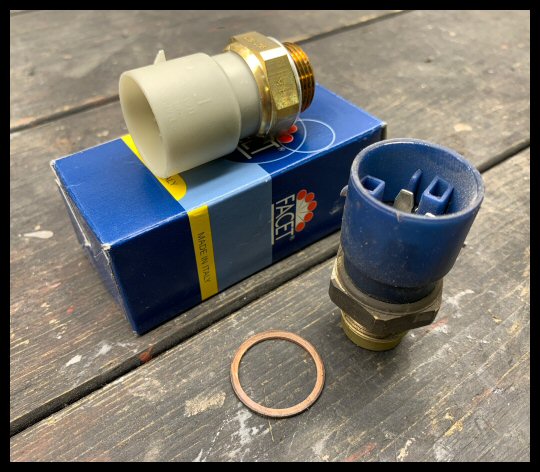
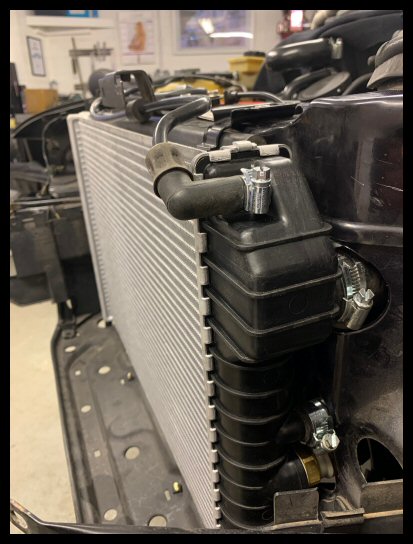
 Radiator
A part in plentiful supply... for once... hooray!
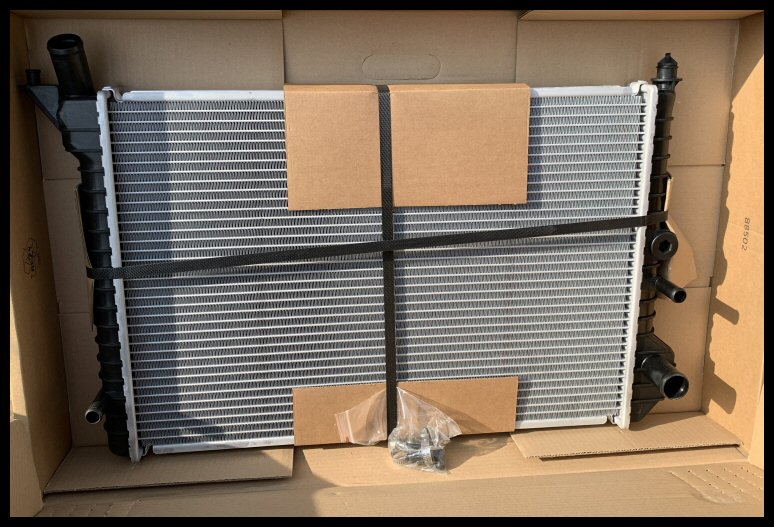
This too is by Nissens... same as my new oil cooler. Thank you Nissens.

Also, my fan switch was dated 1994. It's one of those things... refit the 27 year old item only for it to fail next month... or buy new?
Just like the thermostat, the Turbo has a unique fan switch with a much lower 'stage 1' switching temperature that I've circled below...
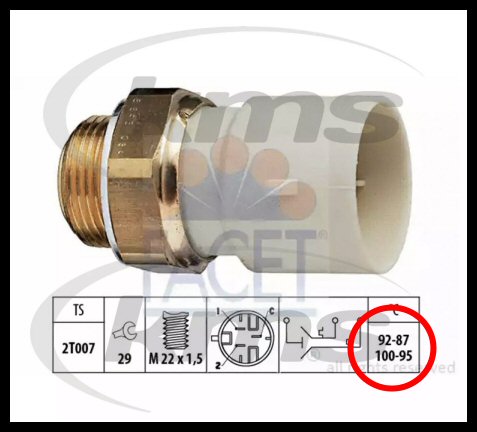
All fitted... with new JCS 'Hi-Torque' hose clamps. These are made in my old home town of Sudbury, Suffolk.... NOT China. I swear by them.
 Headlamps
All stripped down...

All the adjusters corroded and broken...

Anyone would think i'm restoring a car from the 1960's... the corrosion is insane. That and the historic overspray on the glass


Always makes me chuckle because this is a 'late car'. I think nowadays, early or late, it doesn't matter anymore. You have age issues on all of them now.
Just trying my best to rescue the headlamps. None of this is ever seen, but just doesn't feel right putting these back in 'as-is'...
Much more presentable, glass cleaned with fine scotchbrite then polished...

Luckily I had a spare Mk2 Golf unit for comparison, also made by Hella as OE...
All the adjustment clips are the same, and the Golf has much better parts support, so a full set of new clips & sockets ordered...

All fitted...

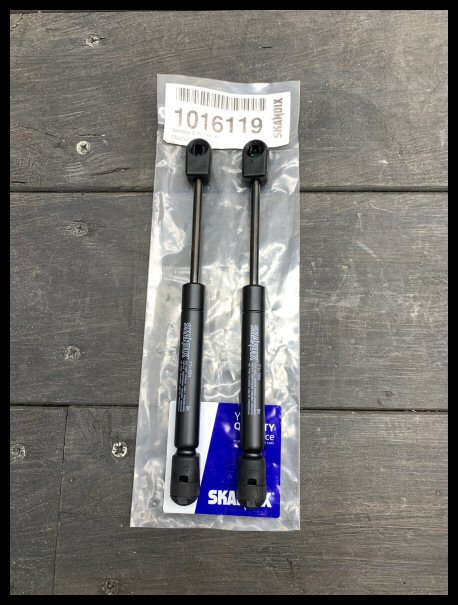
Next up, one broken headlamp hinge that I swapped out for a spare. These hinges are really brittle...

Pair of gas assistance struts from Skandix... pre-brexit Skandix thankfully.
Working pop-up headlights again! My "motor clean" must of done some good as they both sprang into life. I'm as excited to see pop-up headlights now as when I was a kid!
Frames painted...

Ready for fitment...
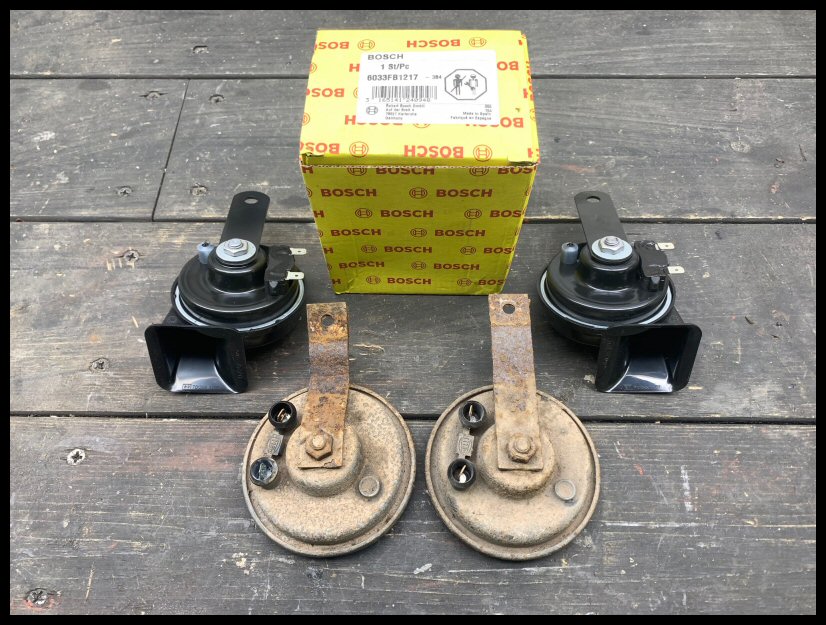
 Horns
Horns
The old horns worked, sure. But they looked awful...
High & low tone Bosch items ordered...
 Dash Rebuild
Following the previous instrument repairs, a rebuild of the upper part of that dash is required to be driveable...

Just checking all the bulbs whilst there is easy access...

Time to sort the infamous crack... yes, I was a victim too. I don't trust a glue repair and it wouldn't be invisible anyways.
I decided to use the plastic filler as used on my rear bumper...

Filler, primer, 800 grit and all ready for final paint... time for a trial fit...

On the final turn of the screwdriver, the bu88er cracked again! This has to be the most rubbish design of anything, ever!

Right, drastic measures! Here on the reverse, you now have a layer of P40, a strip of steel, and another layer of P40...
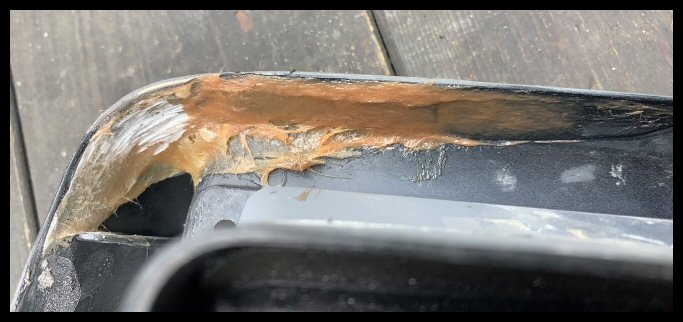
Doesn't look pretty, but the reverse doesn't have to.
Colour trials... RAL9004 "Signal Black"...

All painted...
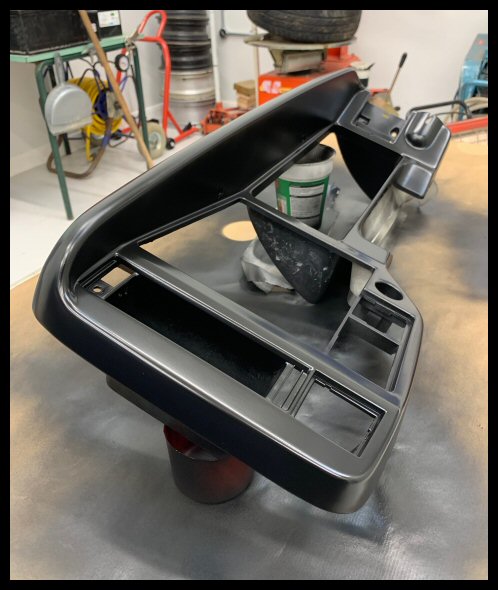
All fitted in the car, with the long-forgotten offending piece pictured... hopefully you'd never know.
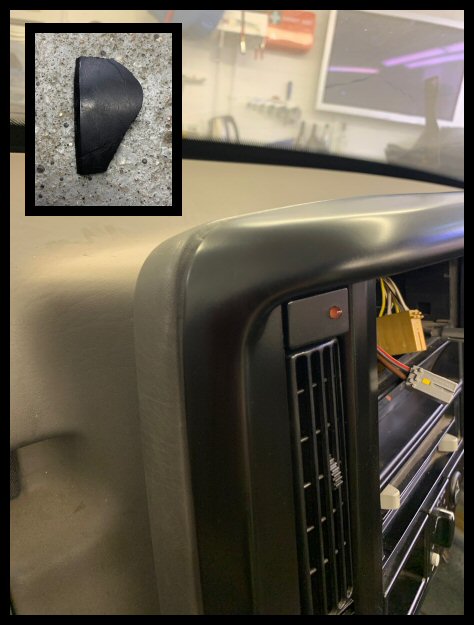
If that cracks again, well, try me

For the first time, the leather 'mk1' two-spoke wheel fitted on the 'mk1' column...
No problems to report, indicators all cancel and horn works. See my earlier update for swapping the stalk holder and short column. SRS wheel & column now lives in the loft for originality reasons... but it won't be missed.
Driver's Seat
I need to sit on
something secure... but I don't want to fit my refurbished full leather for obvious reasons... what to do?
First, run a tap through all the captive floor nuts...
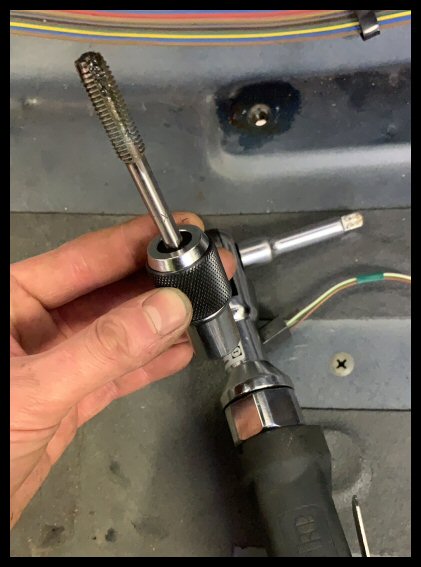 (A new tool of mine - a 'tap chuck'... you can insert your taps and use an air ratchet... for cleaning purposes not cutting obviously... should of purchased one of these a long time ago!)
Then, find the driver's seat you threw on the scrap pile a year ago...
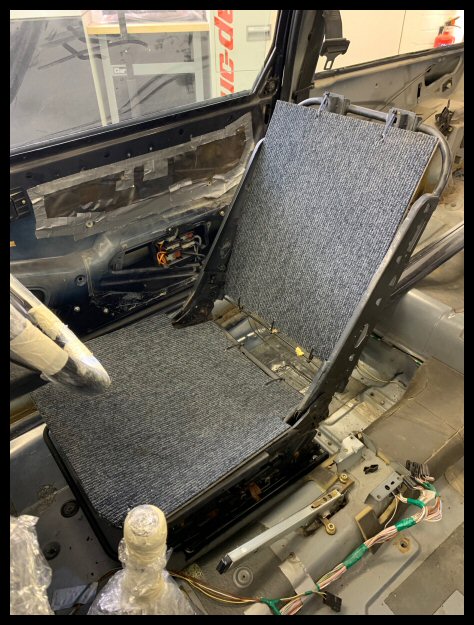
Again, my mistake. I stripped the original seats for spares... without actually thinking they'd be needed again!
I hope the colour of carpet tiles are to everyone's taste
 Running!
With all that done, we can get the car outside for the next task (windscreen removal).
Ignition on... dashboard fully illuminated for the first time!
Funny to think my electric water pump relay has been correctly switching a dead water pump for probably a decade! My VAG electric water pump burst into life and the cooling system almost became self-bleeding... it's awesome! You can leave the ignition on, top up the coolant, and just hear the pump clear all the air pockets.
Don't forget the little bleed screw on the back of the head... its a pain to see and get to!
Engine started and deliberately stopped a few times to keep an eye on the power steering fluid. All PAS lines and rack are a dry-fill. Bled out lock-to-lock just fine.
Kept running, thermostat opens, cooling fans cut in. I can actually see the info centre now for coolant temperature.. such luxuries!
Turned off, and the electric water pump did the five minute after-run.
No fuel / oil leaks. Just one coolant hose clip needed a little nip-up.
My de-ABS brakes feel just fine with vacuum servo assistance.
So in summary...

However, two problems to report

:
1) My clutch release bearing is squeaking like a mouse in pain. I think it's just dry from a lack-of-use. It never squeaked before! I'm hoping that with some use, that will quit making a noise. Just typical as I didn't spilt the gearbox as the clutch material looked fine!
2) My exhaust is far too loud
...back to the drawing board then!
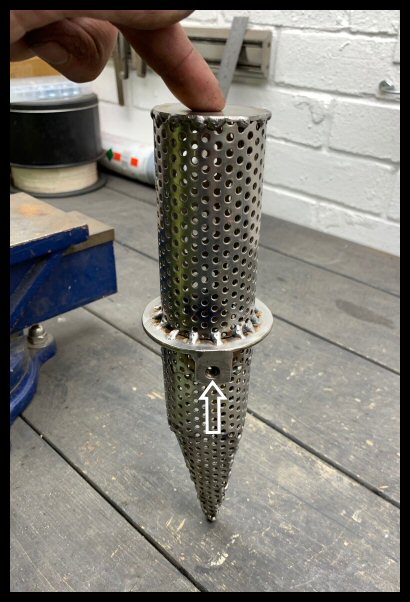
Exhaust System Modifications
Quite simply... too loud!
It has a lovely burble at idle which is what I wanted... but anything above 1100rpm and it's just too 'boomy'.
I am no exhaust scientist but this is my understanding. There are two types of silencer; namely "mufflers" and "resonators".
Mufflers are more OEM and will have obstructive features, or expansion chambers, to consume exhaust energy.
Resonators are 'straight-through' but have perforated tubes lined with fire wool or similar.
All my silencers are resonators. This is the problem. You have nothing to slow the gases down to consume energy (noise).
My attempts at a solution... step 1) get your wallet out again...

Cut your perforated tube...
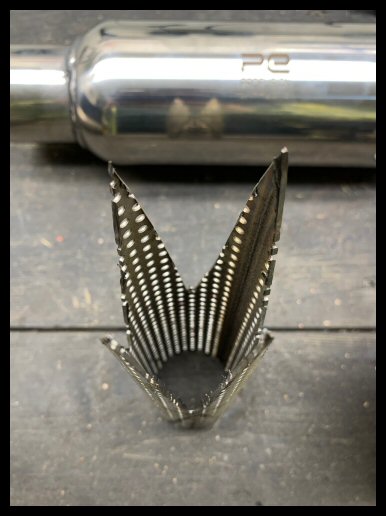
To make a perforated cone baffle. Cone baffles are used as they have a large surface area... meaning that the sum of perforations are equal or greater than the diameter of the pipe. So, a restriction to absorb energy, but with no mathematical restriction.

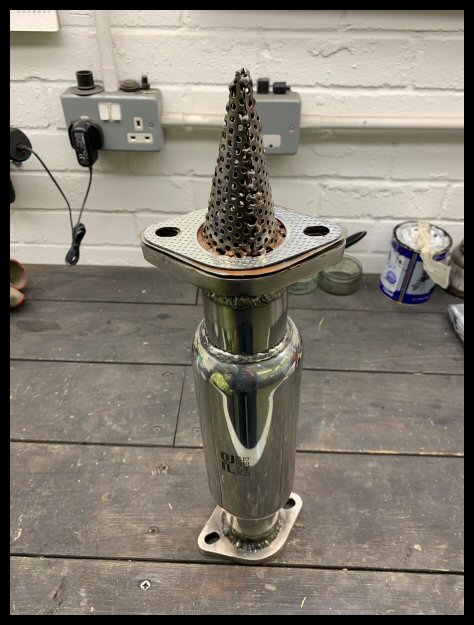
Then convert my de-cat pipe into another silencer...

De-cat pipe now another resonator, together with a double perforated cone. I gave this double cone a sandwich flange so it can be bolted inside the exhaust system using the flange for security...

Ready for fitment...
Then making my second baffle for the rear box...

All ready for fitment with captive nuts...
As the tailpipe is removable by design, this can be inserted and bolted in...

Conclusions; much better. It's no longer loud, but it isn't quiet either. I still can't comment on what it sounds like under load. Time will tell for the ultimate conclusion when I can drive the thing, but for now i'm happy.
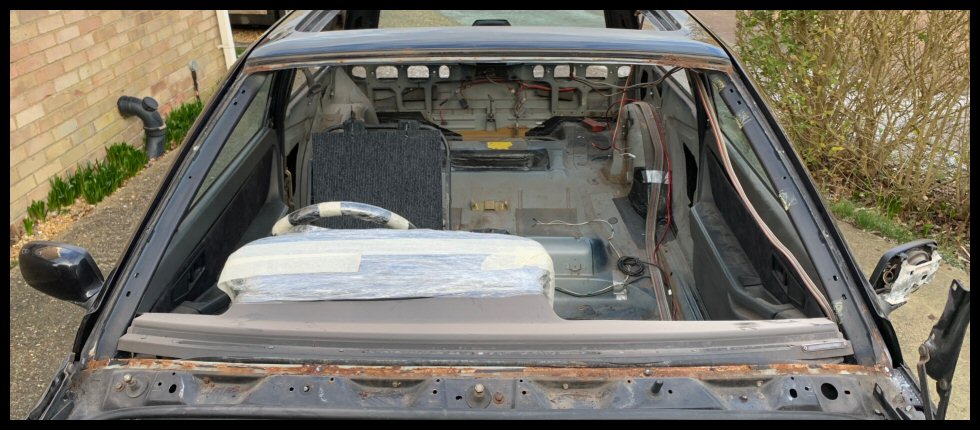
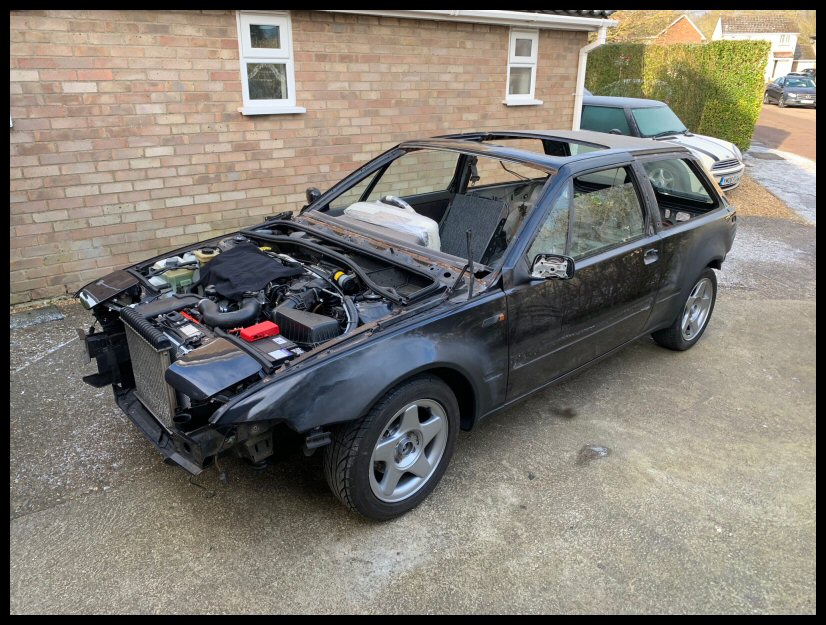
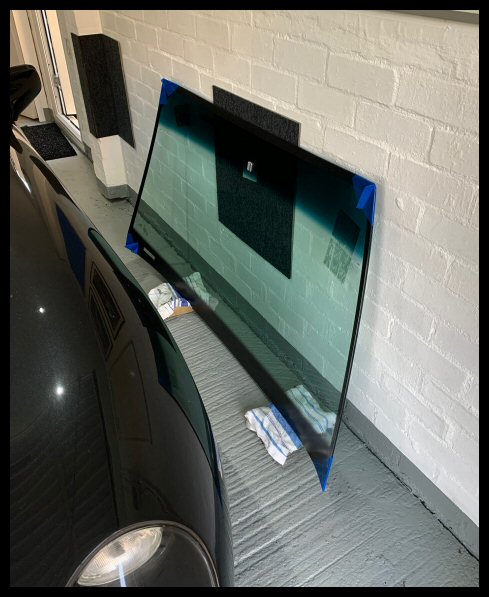
Windscreen
Now the car is driveable again, I can get it outside and open both doors for the windscreen guy.
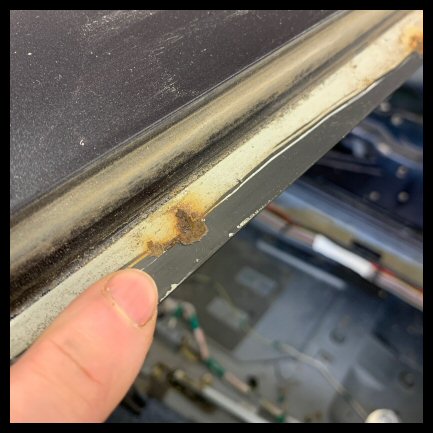
As per the last update, I started removing windscreen trims in paintshop preparation, only to find yet
MORE corrosion issues...

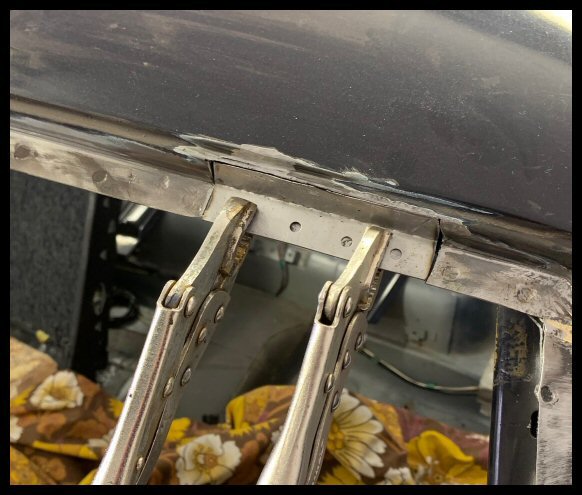
That (above) is the top edge to the roof, completely hidden by the seal. Rust expansion has also cracked the screen.
I removed the headlining and this was confirmed further...

I still can't truly see how bad it is... but if it needs welding, then I need to do that myself to keep paint shop costs down.
I phoned 'the big five' windscreen companies in Cambridgeshire. I wanted a two visit approach... 1st visit cut it out... 2nd visit to install a new screen
after the paintshop.
One wasn't interested in private sales (wanted insurance 'cream' only). Two never replied with a figure. One quoted £580. Yep, you read that correctly! £580

Thankfully, Silver Shield of St. Ives (Cambs) understood exactly what I needed and gave a more palatable, but not cheap, quote.
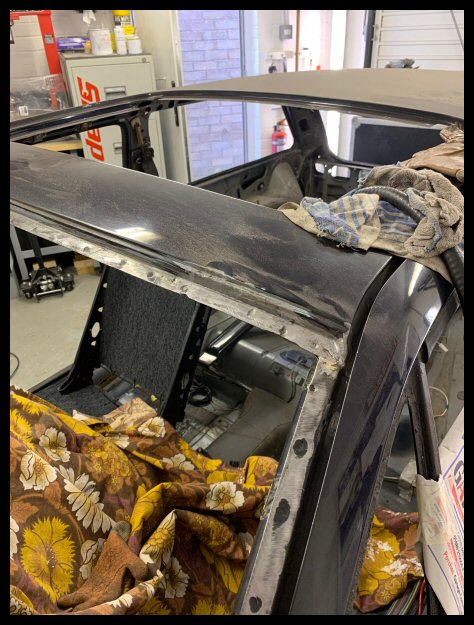
All cut out...
Sadly, the washer jets fell victim to this task... thanks!

Rust severity clear to be seen...

May I present Volvo 480 design flaw number 1473... I seem to have found them all
Where the window frame is painted, no problems whatsoever...

However, the top and bottom channels have no top coat... just primer - and there's your problem...
Why are the top and bottom seams masked from top coat?
Makes no sense to me

Anyways...
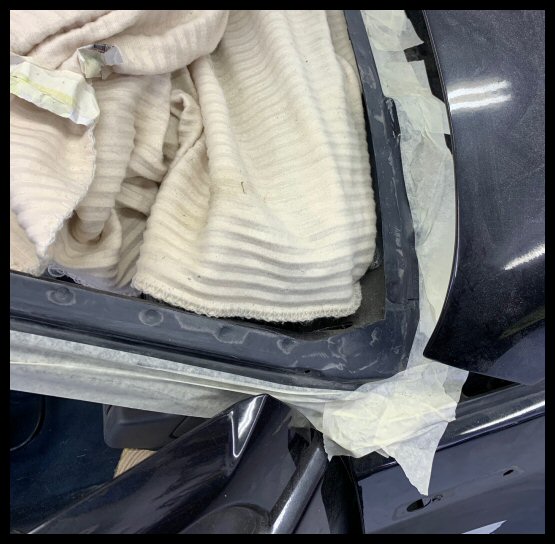
Rear quarter glasses also removed...
I also now have in my possession a brand new Pilkington front screen, with a dark purple OE top tint, which is cool.
I wanted this in my possession ASAP as I don't know how long the paintshop will take. I can breathe a sigh of relief knowing this is secured.
Last part of fixed glass.. the door quarters removed...

Time to clean the aperture...

Cutting out offending sections...

New metal going in...
Ready for final prep...
Hydrate 80 applied and masked up for 2K zinc rich primer...
Primer applied and ready for the painthshop...
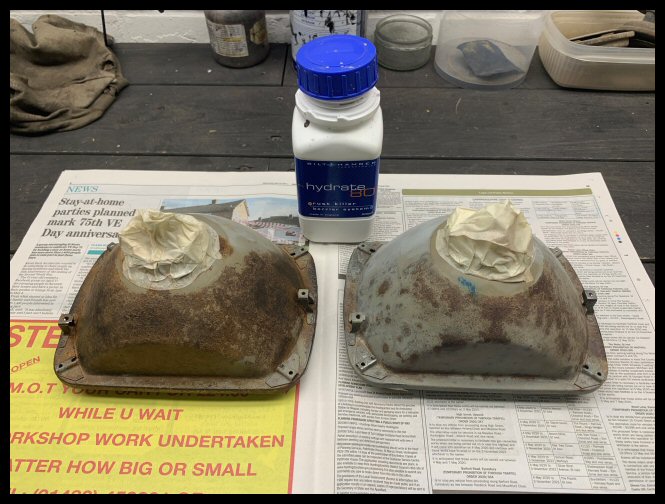
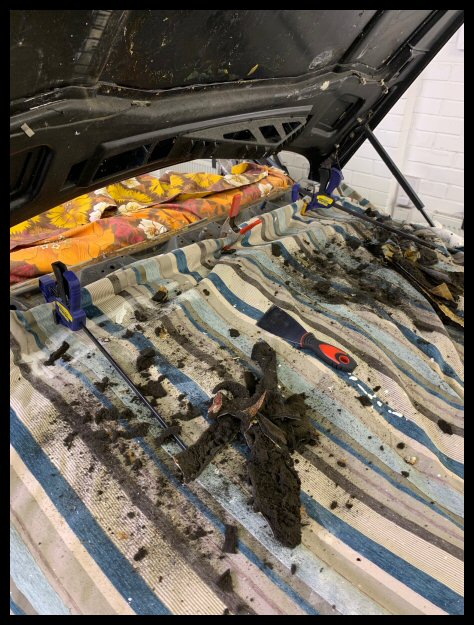
 Bonnet Insulation
This had clearly seen better days...

Any contact would result in a shower of debris...

All removed (a hateful task) to maintain paint booth cleanliness more than anything else...
Solution TBD!
I note that the old stuff had a metallic backing with two (left and right) ground straps. One explanation for this is to prevent radio interference... which I find strange as the aerial is located at the nearside rear quarter.
My TVR has a fibreglass bonnet but with no ground strap... although TVR is not known for complying to regulations
To be honest i'm tempted to go just 'foam only'. Like I say, TBD post-paintshop.
Door Mirrors
My nearside door mirror was kindly 'self-dismantling' for me as the cover came off in my hands...

All the locking tabs broken off (circled) and historic sealant...

The mirror itself was not much better... the entire frame cracked with historic Araldite...
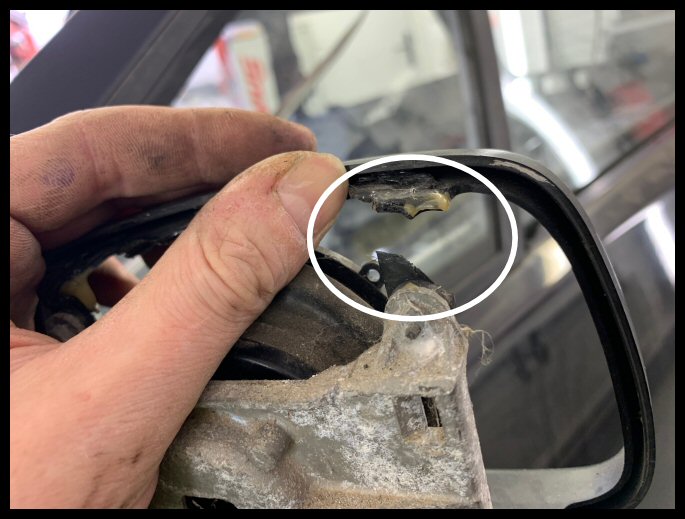
Good old eBay to the rescue with a well used, but entirely sound item...

I now have two 'sound' covers, with all tags present & correct for the paint shop...
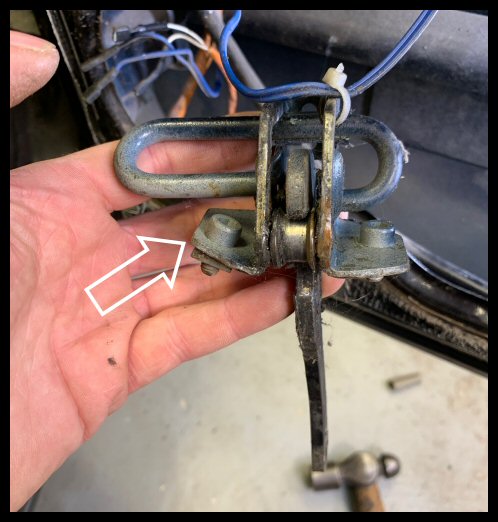
 Door Check Strap
The driver's door check strap has never been particularly clever. Probably just a broken spring right?
Door card removal for the mirrors allowed me to investigate further...
A deformed check strap (as arrowed below) literally *fell* out... complete with bolts...
What lurked within the door I can only describe as utter carnage...

Fractured, torn, bent, rusty, captive fixings torn out.. how on earth did it get this bad?!?
I did a thread search on here and it's yet another
"480 design feature" it would seem!
Anyway, repair sections made with captive nuts...
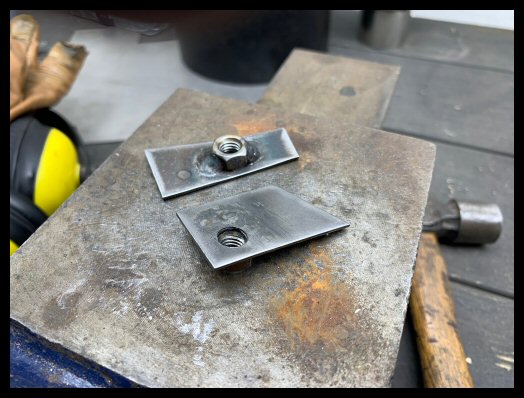
Thankfully the door is double skinned, so my weld repair is invisible from the outside...

All painted and check strap re-fitted. I now have a driver's door that maintains position!
And then nothing...
Lights turned out i'm afraid...
for March... April... May... I received three consequtive paintshop cancellations sadly. A backlog of other peoples projects the reason.
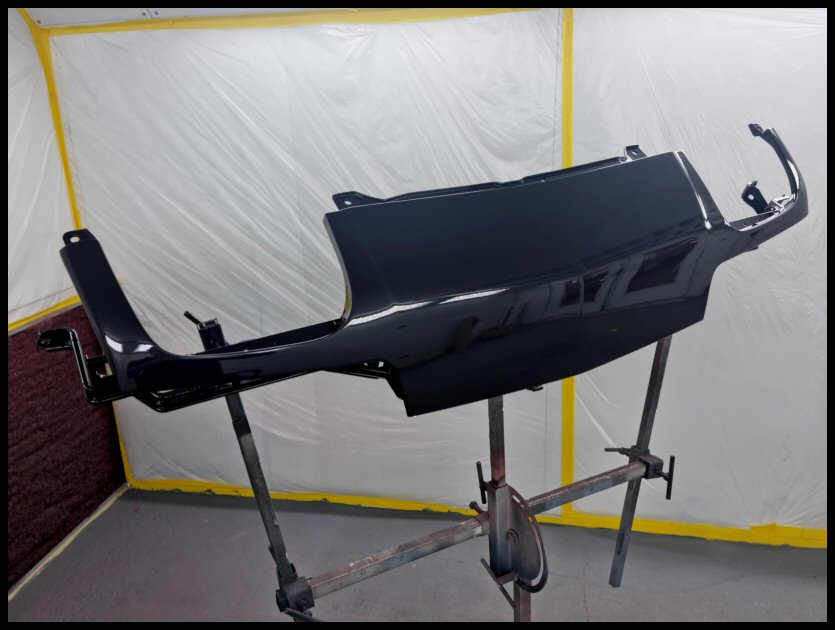
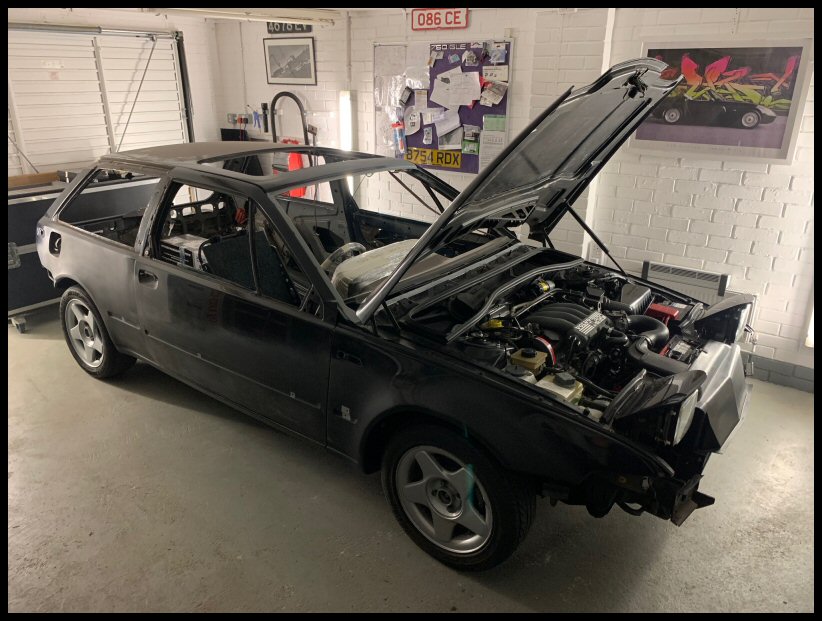
Finally!
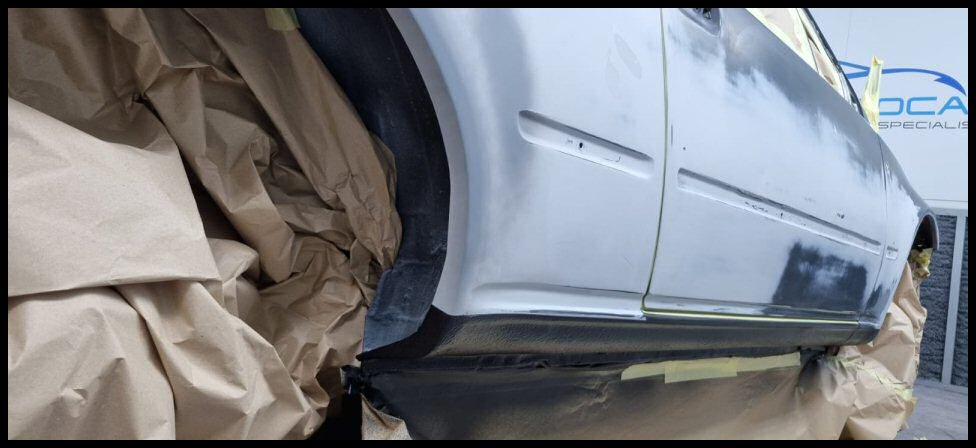
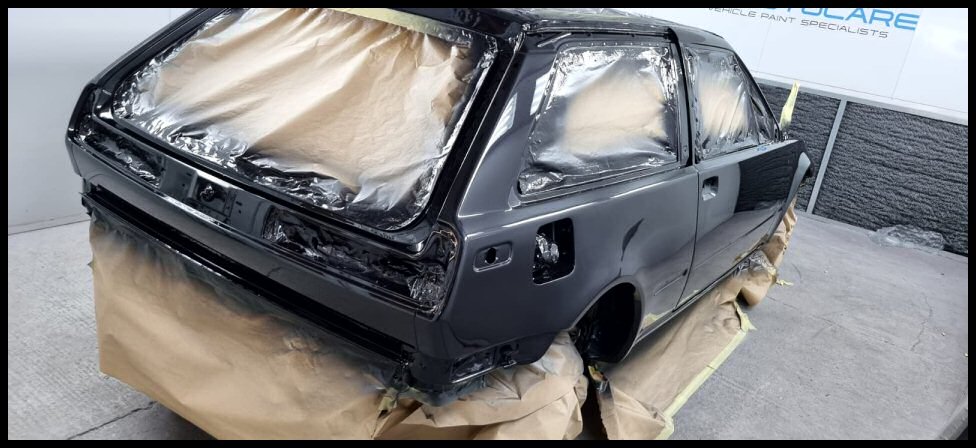
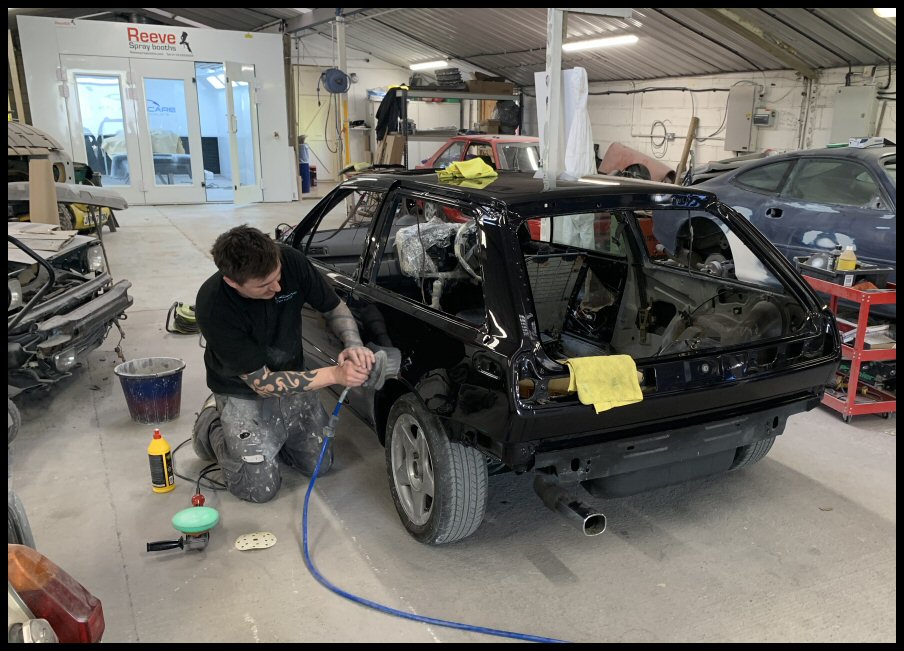
Then, finally, second week of June, we have movement!

Giving the neighbours something to twitch the curtains for! They probably think it was getting collected for scrap
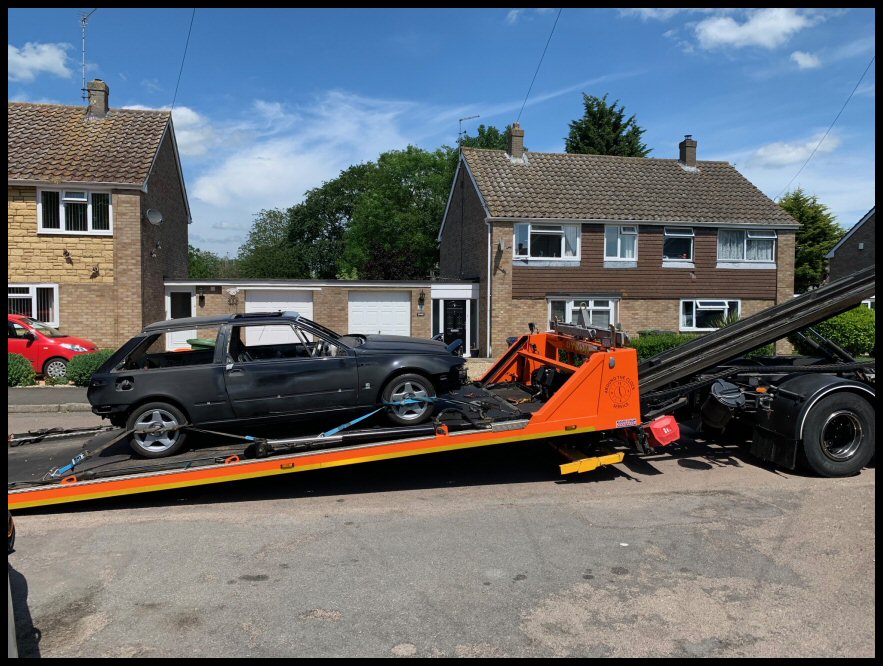

It's amazing how rubbish it looks for 438 'billable' hours. I'm just hoping when it returns from paint, this will all make sense.
I'm using a guy very local to me in Molesworth. He's pretty much a one-man-band and has a loyal customer base. I used him in 2012 for the Mk2... he painted the offside rear quarter. He also removed a tow-bar hole in my rear bumper which nearly ten years later you'd still never know...
Timescale unknown.
Also, price largely unknown... we have discussed a "ball park figure", but we all know how that goes. You never really know until paint is stripped back and my work is critiqued.
Feels like a milestone reached, but on the flip side, still a heck of a long way to go!
Hopefully some paint booth photos to follow.
All the best.
JKM.