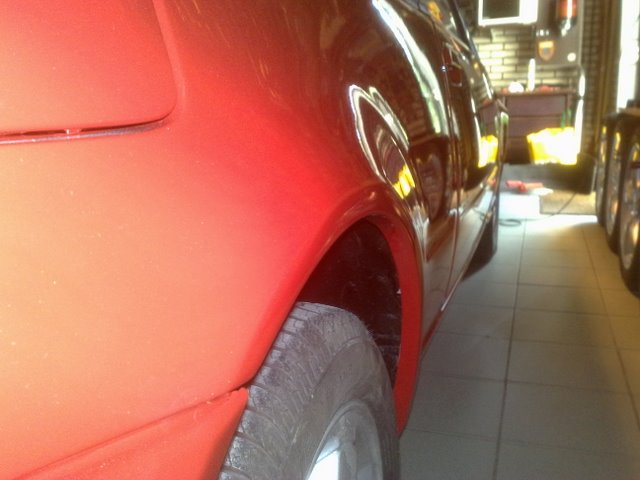
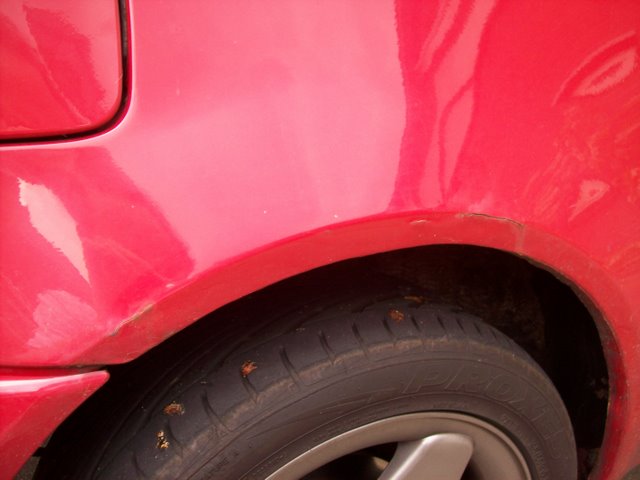
Well, I thought this would be the right time to show the experiences from last week with you all. I wanted to have my car resprayed as the red paint isn't as red anymore as it once has been. There were some rust spots that needed fixing. After someone hit my car when it was parked and caused a dent in de right front wing, the time had come to begin.
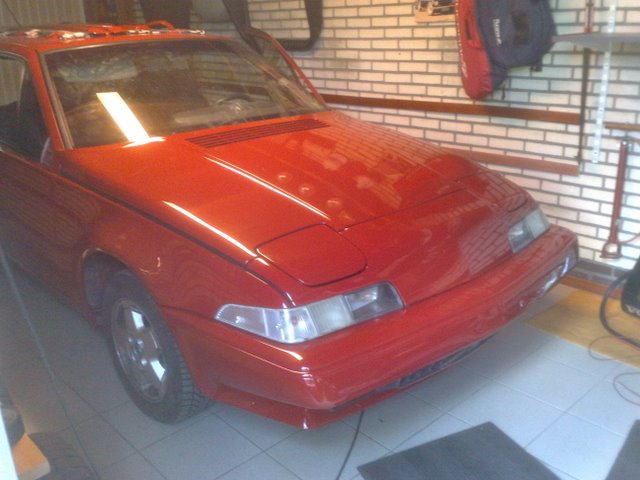
Then, the first decision. Which color to choose? I chose to keep it original, so the car will be resprayed in red 231. The parts that really needed more or less new paint were both rear arches, the roof, the left door and the right front wing. Together with a hood that is faded it doens't make sense to have only those parts resprayed. So, the whole car has to be done.
First some pictures of why the car needs some new paint:
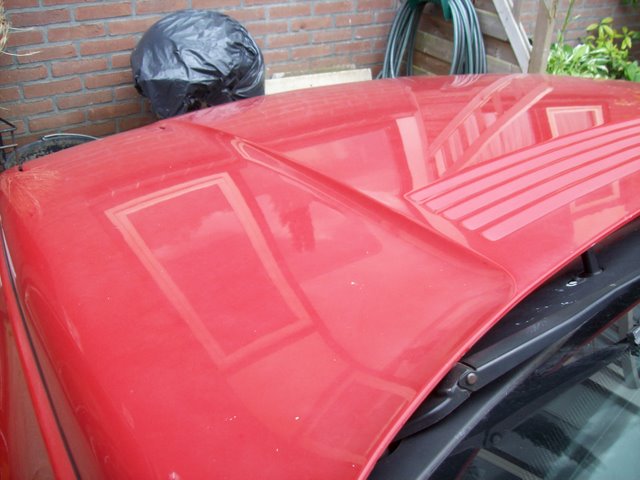


What do you think is this?:
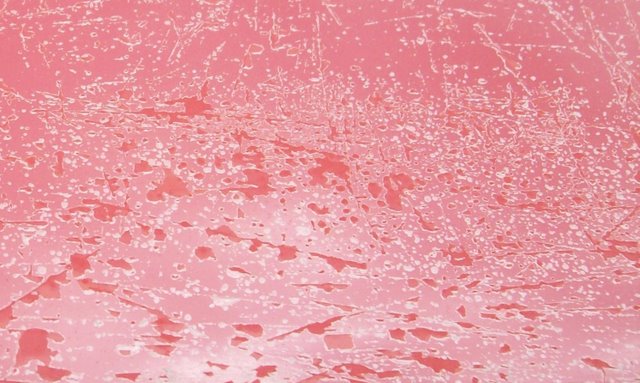
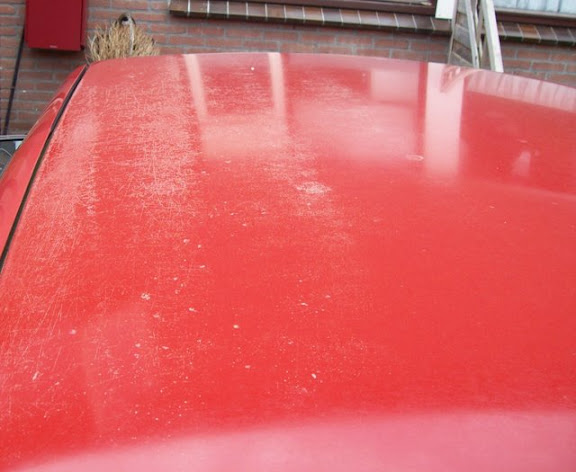
Well, it is the roof. Don't know what the history of the roof is, but somewhere in the life time of the car it has got a layer of clear paint on the roof. Two years ago it started to fall of:
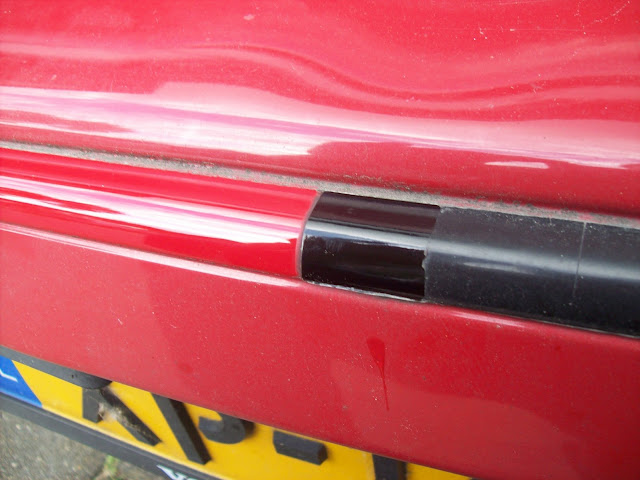
I first started with removing the black stripes at the sides and the bumpers of the car. It revealed the true color of the red paint and the black stripes:
Everything went fine so far. Then it was time to remove the rear clusters, which were sealed with window sealant. One i sealed myself with one line of sealant around the cluster. It was fairly easy to remove this cluster. The other one however, was already sealed when I bought the car. It was sealed with so much sealant that it was pressed out at each side and at the inside of the car. It took me 1.5 hours to get this cluster out in one piece.
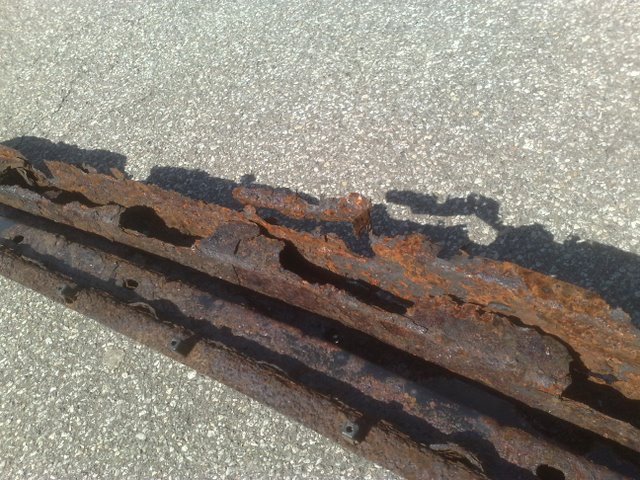
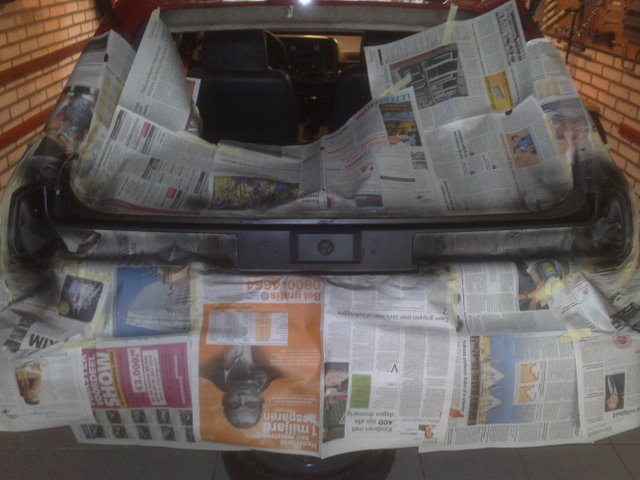
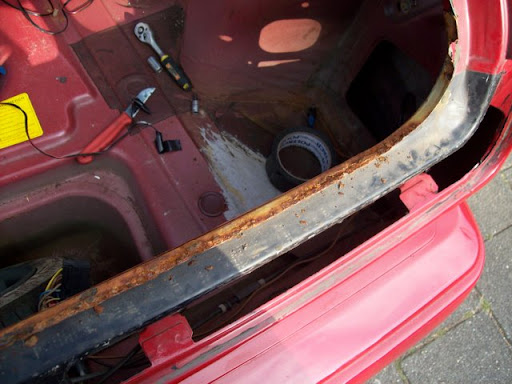
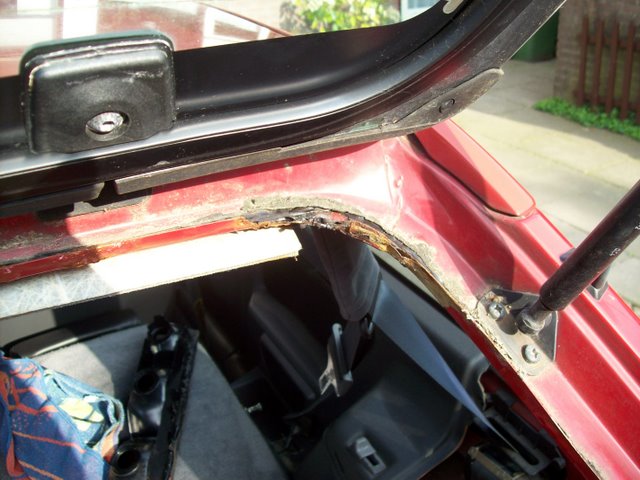
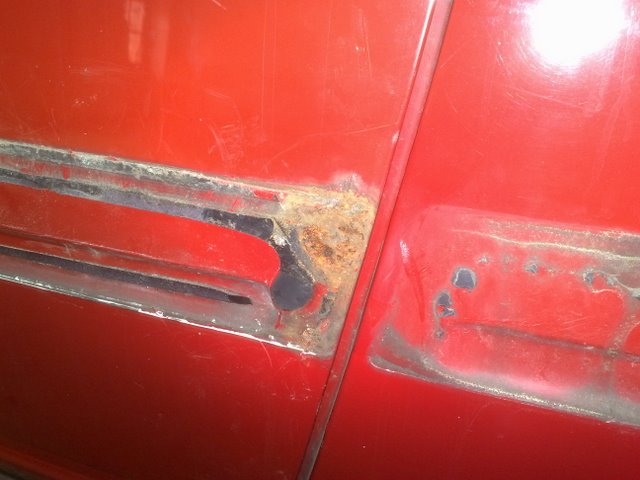
The tailgate sealing rubber was leak free because it was sealed with some kind of sealant. It came off easy, but what was hiding underneath the rubber was kind of a shock:
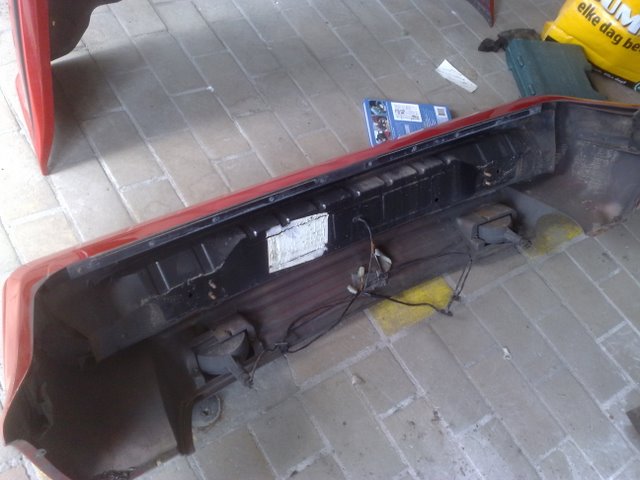
The day after I brought the car to the place where it is going to be resprayed. The tailgate rubber holding edge will be fixed, only the total price will be higher. I have disassembled most of the car myself. I was a bit worried about the rear bumper as the inner bumper is known for being rotten away, but it wasn't. The rear bumper is replaced years ago by the previous owner. Look at the nice rear inner bumper:
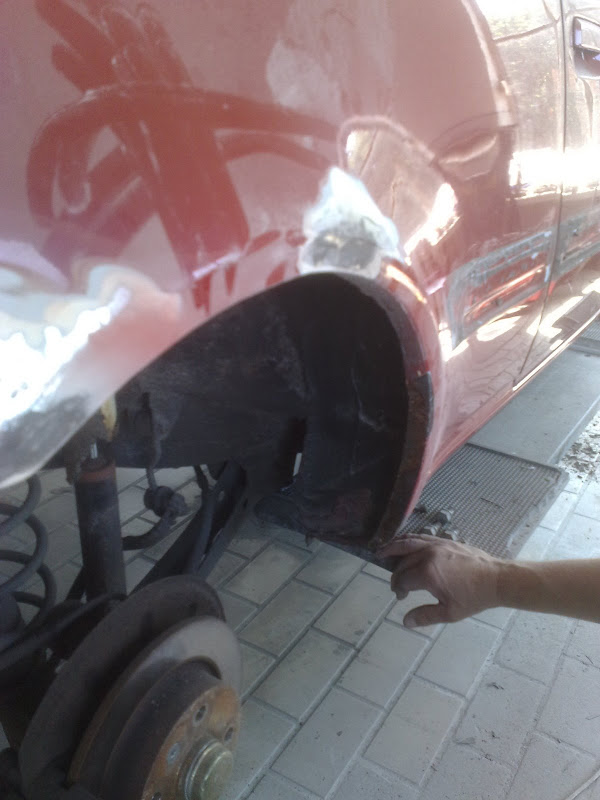
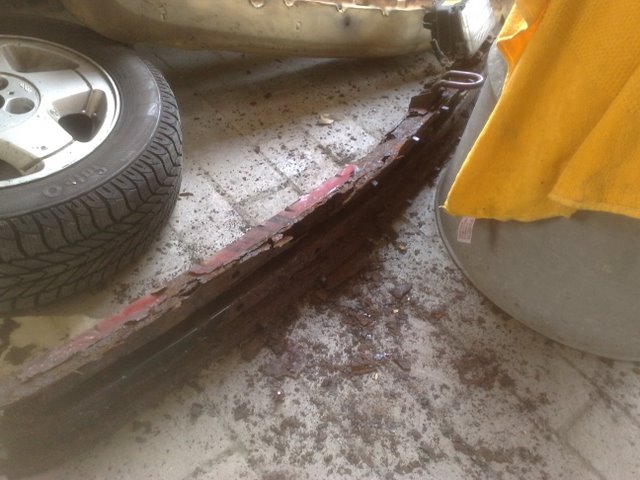
The front bumper turned out to be in a 'bit' less good condition. From the outside it looked reasonable. With some rust and fallen of paint at the bottom side of the inner bumper. But when trying to remove one of the foglights, it felt of without applying much force, taking the mounting brackets with it. After separating the inner bumper from the outher one, it became clear that a bumper can be that rotten and still looks reasonable from the outside. Note that at next photo, all the mess on the floor are parts of bumper and are something like 10% of the total amount that came of:
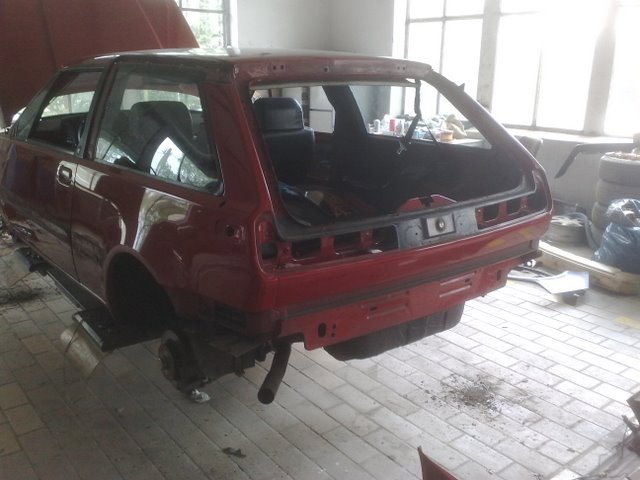
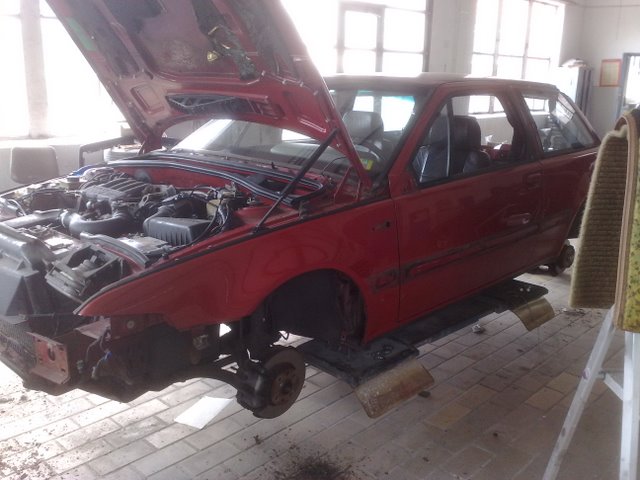
Here are some more pictures of how the car looked when I left:
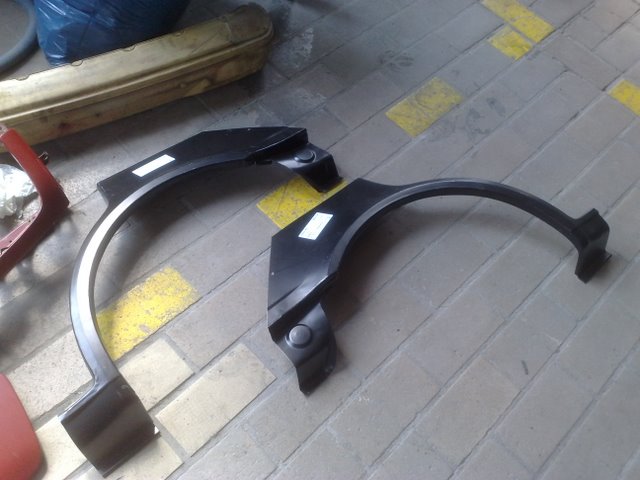
To end this part of the story, some nice 440/460 replacement arches that will be used to replace (parts of) the rusted arches.
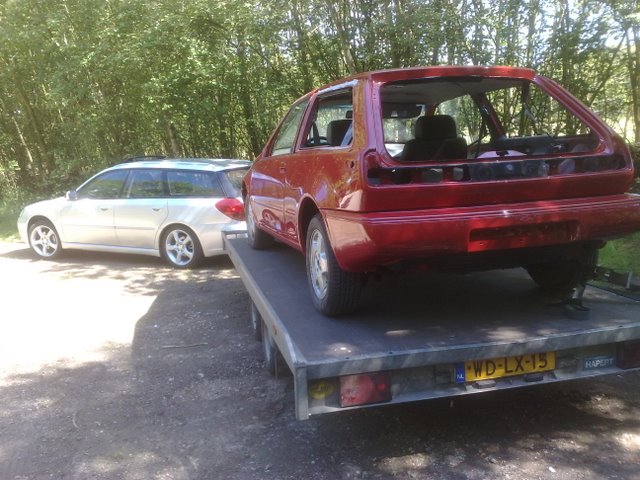
This is the story so far. Next week friday I will get the car and bring it home on a trailer. At that time it should have been welded, smoothened, completely resprayed and have the black stripes sprayed on the bumper and sides. Then at home I'll reassemble everything.
To be continued.....


 This car was a mistake